All students can create their individual schedule in campo, where they can view specific dates of their courses for a semester, the lecture period, or a single week.
Where can I find my schedule?
To create a schedule, you must be logged in to campo.
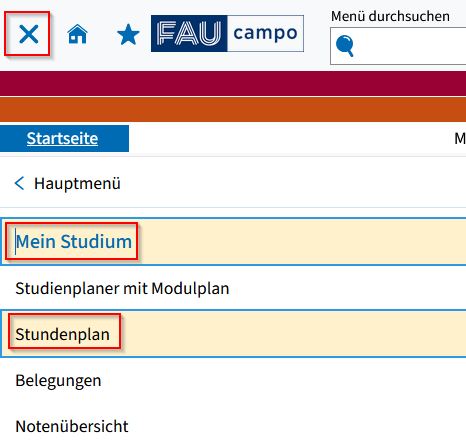
You can view your personal schedule by accessing the main menu and following this path:
- “My Studies”
- “Schedule”
- This overview shows the courses and examinations that you have selected (see below) or attended and that are held in the specified period.
- Students register for courses via StudOn and this data is automatically transferred to campo.
- Exams that students have registered for in campo are also displayed in the schedule.
Hovering the cursor over the individual entries makes them large enough to read.
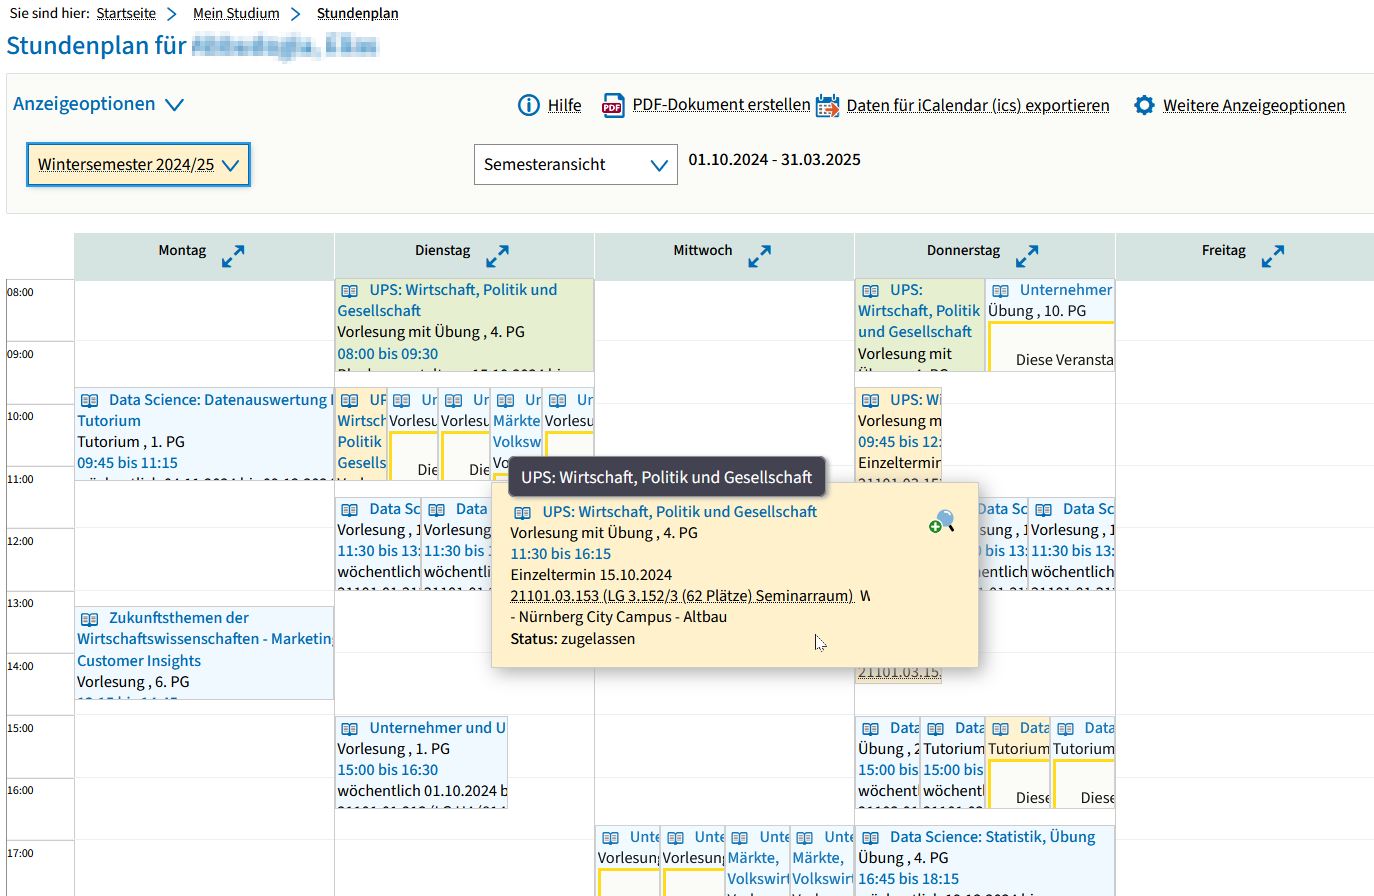
The individual entries are marked in different colors. The key below the schedule explains what these colors mean.
Under “Display options,” you can select various settings for displaying your schedule. In particular, you can set the semester and the time period here.

You can find a detailed description of the various settings by clicking the “Help” link in campo.
You can view your schedule in campo and also export it to standard calendar software.
Right next to the help, you will find two options for exporting the schedule:
- The schedule can be exported as a PDF document: This creates a PDF document according to the formatting you selected, which you can save and, if necessary, print. Please note that this file is not linked to live data. If you make changes to your schedule, you must also create a new file.
- The schedule can be exported as calendar data for your email program (e.g., Outlook) using the “Export data for iCalendar (ics)” function.
Here, you can choose between linking to your calendar which will also transfer all changes using the “Copy link” function, or creating a static copy (snapshot) using the “Open iCal file” function. We recommend using the “Copy link” function.
To customize your schedule, you can add and remove individual courses. To do so, proceed as follows:
- Log in to campo.
- Access detailed course information via the course catalog or search for courses function. For more information, please see our guide “How does the course catalog work?”
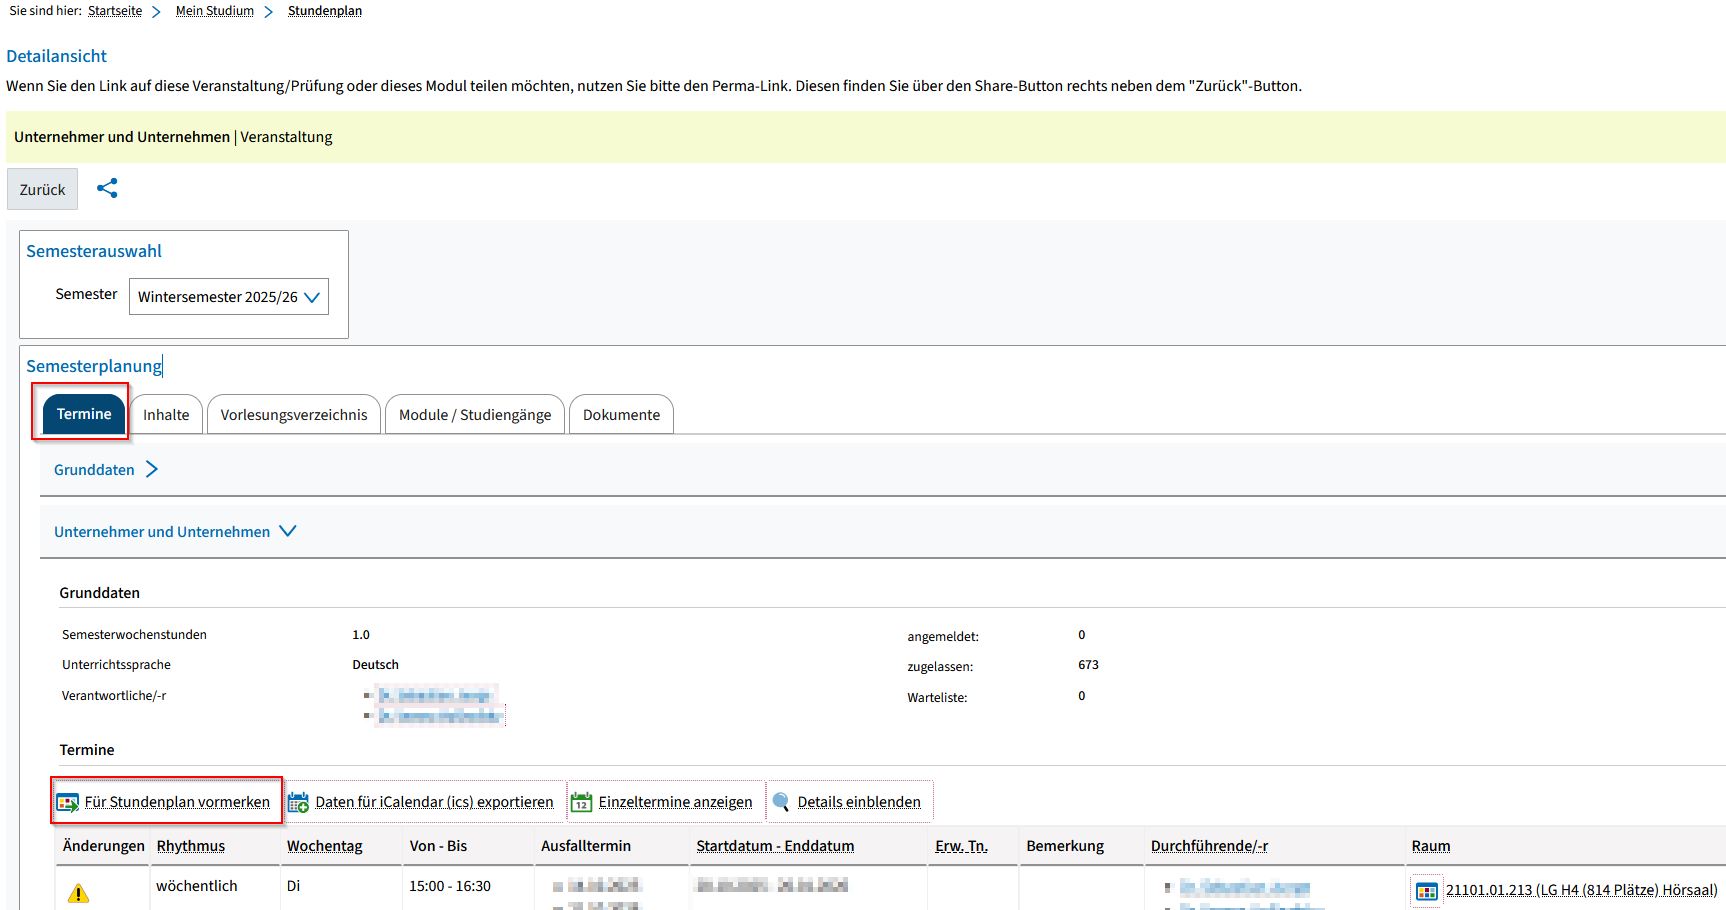
- Switch to the “Dates” tab
- The course dates are shown and you can decide which parallel group you would like to add to your schedule. Click “Pre-booking for schedule”.
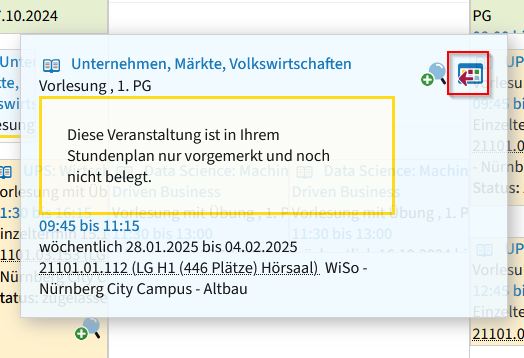
Once you have added a course to your schedule in this way, the cancel pre-booking function will be shown, which you can use to remove the course from your schedule if you decide to do so.
When you access your schedule next time, you will see that the course has been added to your schedule. Moving the mouse over the course expands it to show further details and you can remove the course from your schedule.